How to Fillet a Mahi Mahi
One of the few things Ryan Griffin loves to do more than catch mahi mahi near his California home is to cook it, but ensuring perfect meals first starts with proper fish cleaning. He uses a variety of tools and a lifetime of experiences to produce a perfect piece of fish every time.
1. Keep the Fish Fresh After Catching
That starts with an insulated fish bag. He gills and guts his mahi as soon as he catches them, and then puts them on a healthy dose of ice for 12 hours if possible. “Your meat comes out firm, cold, it makes it really easy to vacuum seal and process and you end up with just a nice clean product at the end of it,” he explained. For more tips on how to take care of your fish properly and keep them fresh from ocean to table, check out our guide on the best way to keep fish fresh after catching.

2. How to Fillet the Fish
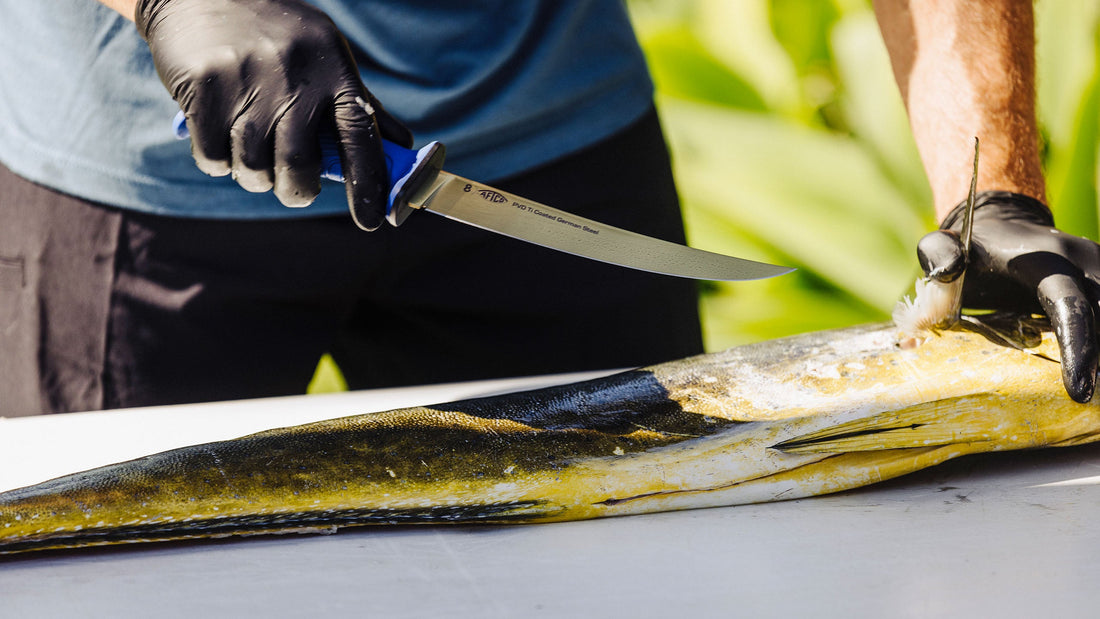
Fortunately, mahi is a comparatively easy fish to clean, and there’s lots of meat on the bones. Some anglers and chefs like to trace the cut with a fish fillet knife and peel the skin off to expose the bloodline. Griffin does it a little bit differently.
The first cut is behind the pectoral fin, heading toward the belly. He’ll then score the skin heading toward the tail. After that, make a cut all the way up behind that pectoral fin, ensuring that you don’t miss the ample amount of meat in the head.

Subsequently, he makes a shallow cut down the back of the fish, heading toward the tail, ensuring that the bones are beneath the knife and the meat is on the top. When the meat is separated from the backbone, he’ll use the tip of the knife, breaking the rib bones to expose the spine. At each step, it’s critical to be slow and deliberate to avoid mistakes and maximize yield.

With the fillet starting to separate, he’ll lift up on it and press down on the body. “The AFTCO fillet knives are great for this,” he said. “They’re really flexible.” Now the fillet is removed, with the skin on and the bloodline intact. Next, flip the fish over and repeat the process on the other side.
When cleaning your fish, it’s important to fillet it with accuracy and precision using a sharp fillet knife. For tips on sharpening, see AFTCO’s step-by-step guide on how to sharpen a fillet knife.

3. How to Remove the Fish Collar
The two fillets are the main haul, but there are also the collars. Some anglers struggle with removing them, but once again Griffin has come up with a system. He sticks the flexible knife under the joint above the pectoral fin, cuts, and then turns the knife the other way to pull down. With a gentle cut, the whole collar comes out. He trims off the membrane, splits it right down the middle, seasons the collar, and puts it on the grill. “It’s really a nice appetizer,” he said.

4. How to Prepare the Fillets for Vacuum Sealing
Returning to the fillets, he removes the stomach liner and any meat harmed by gaff marks or other imperfections. He continually cleans the knife between cuts to make sure that any slime or blood stays away from the otherwise pristine meat.

With his shiny fillets in front of him, Griffin cuts them on either side of the red bloodline to eliminate that contaminant and get rid of the pin bones. Next, he breaks them down into pieces perfect to fit quart-sized vacuum-sealed bags. He goes gently down to the skin but does not cut through it, rotating and letting the knife do the work. The result is world-class pieces of fish that’s thrilling to catch, sustainable, and great cooked in a wide variety of manners. To keep your fish fresh even longer after it has been filleted, check out AFTCO's guide on how to vacuum seal fish.

Check out Ryan’s Panko Crusted Mahi Mahi Sliders or his Bluefin Poke recipe for ideas on how to enjoy your catch!